
I have been hand making double sided coin rings now for longer than I can count. I have made hundreds of rings. In fact, I could probably remember every single one of them if I thought about it hard enough. Each ring I made was special to me as I made it. I've never cranked out my rings in large amounts or for profit. That is something I think people often confuse me for, is a businessman running a business. I am not. I am a person, that constantly seeks challenge and exploration. I am a gold miner by trade. Back breaking hard laborious work. Certainly the extra income from ring making would put me in a better position financially if I was to go the business route with it. I don't do trade shows, events or local swap meets. In fact, I have never done a show of any kind. Its simply not what I am about. I know I make some nice pieces. I could make it a business and churn out rings like a mad thing if I wanted that. But. I have said it many times. I don't want this to be a business. The day its a business, is the day I don't care about it anymore. And I wanna care about it. Its opened many doors for me I would have never had the chance to explore. Its not about money. Parts of it are. Obviously. I have to keep it going. But. Its about what can I do next that is better than what I did last. And who can I make happy this time. Will I be lucky enough to sell my work to start a new project. Will I be so lucky as to make another wedding band for someone? That is always a big deal - making a wedding band. When I started this, I never thought I would reach a level to make wedding bands yet alone even see them sell. Its still an honor every time a piece sells. As it propels me along to the next project. And I hope to do many more rings for people. Because I invest myself into each piece. I work hard. I get frustrated. And then I feel a level of accomplishment once I get the piece completed, perfect and passed on. Each project is a little journey. A little exploration. No machine can match that. I don't care what the excuse is.
 Something people are leaving out of this craft as new ring makers spring up all around. Is the personal investment in it. Many come to me for advice. They always say the same thing, something very flattering, then they get to the point. They want to know how its done and then tell me not to worry, they are not going to be making them to sell. Then, they show up a week later, selling rings by the dozen. They didn't like my advice. So they took the easy route. And went for the machines that do the work for them. They see a hand-made ring sell for a well earned price, and figure they can have a machine do the work with out breaking a sweat and collect the rent as I call it. I feel it's tacky. Its cheap. Its a fine Scotch Whisky VS some cheap 12$ gut rot Whiskey. It's been ruining what the real coin artisans do, thanks to cheap profiteers producing rubbish. And people buying cheaply made rings they produce. But. People will spend what they wanna spend on whatever they want. And people are going to make these rings however they want. No stopping it. No point fighting it. I am here simply to tell you, that I am still making rings the same way I always have. No machines. All hand tools, always hand-made. And I will continue to as long as there is still interest in old fashioned hand-made artisan pieces. Pieces with energy. With life. Not some soulless mass produced copied piece those other guys did on their lathes and automated presses while watching it happen.
I am still here to teach those of you who are truly interested in making rings by hand. And to help motivate you. My way is traditional. But I am not, Amish about it.
People that want quality hand-made pieces from experience will visit me, or other ringers or coin artisans that remain true to the trench art revival styles who do their work by hand. Who do this because its what they do. And do it because they, like myself love to do it.
People that want quality hand-made pieces from experience will visit me, or other ringers or coin artisans that remain true to the trench art revival styles who do their work by hand. Who do this because its what they do. And do it because they, like myself love to do it.
 |
| Using a router bit to remove burs and file away the center hole. |
Anyway. This little precursor to the real post "creation" is a bit cranky, but the intent is to make it clear I am a by hand coin ringer. And I simply don't give a crap about pieces made by machines. They are two different worlds. I welcome you to mine. And hope you can end up teaching me a thing or two.
Visit me on Facebook, or Twitter @Ryanoshea36 and say hello. I enjoy talking rings just as much as I like making them.
In my next post The Art of Hand-Made, Part 2 "Creation". I will be going over how to make a coin ring. So be sure to subscribe, check back, or bookmark. The next post is the one most of you have been waiting for. And a glimpse into something even bigger.
The typical mediums I work with are Gold, Silver, CuproNickel and Bronze / Copper. Below are some examples of these. And what you to can use in your ring making. In my next post, I will cover Coin Alloy's. And what is best to use for beginners, and what the difference in Alloy Means. So stay tuned. For those of you following my posts. THANK YOU. Please keep at it! Share your work with me. And if you wish, I will post your hand-made pieces in my posts to share with others. Enjoy the pictures. For those interested in purchasing a ring, there are always some rings up for sale at OSheaCoinRings.com. But you can email me for a custom order here O'Shea Coin Rings, Order Email.
 |
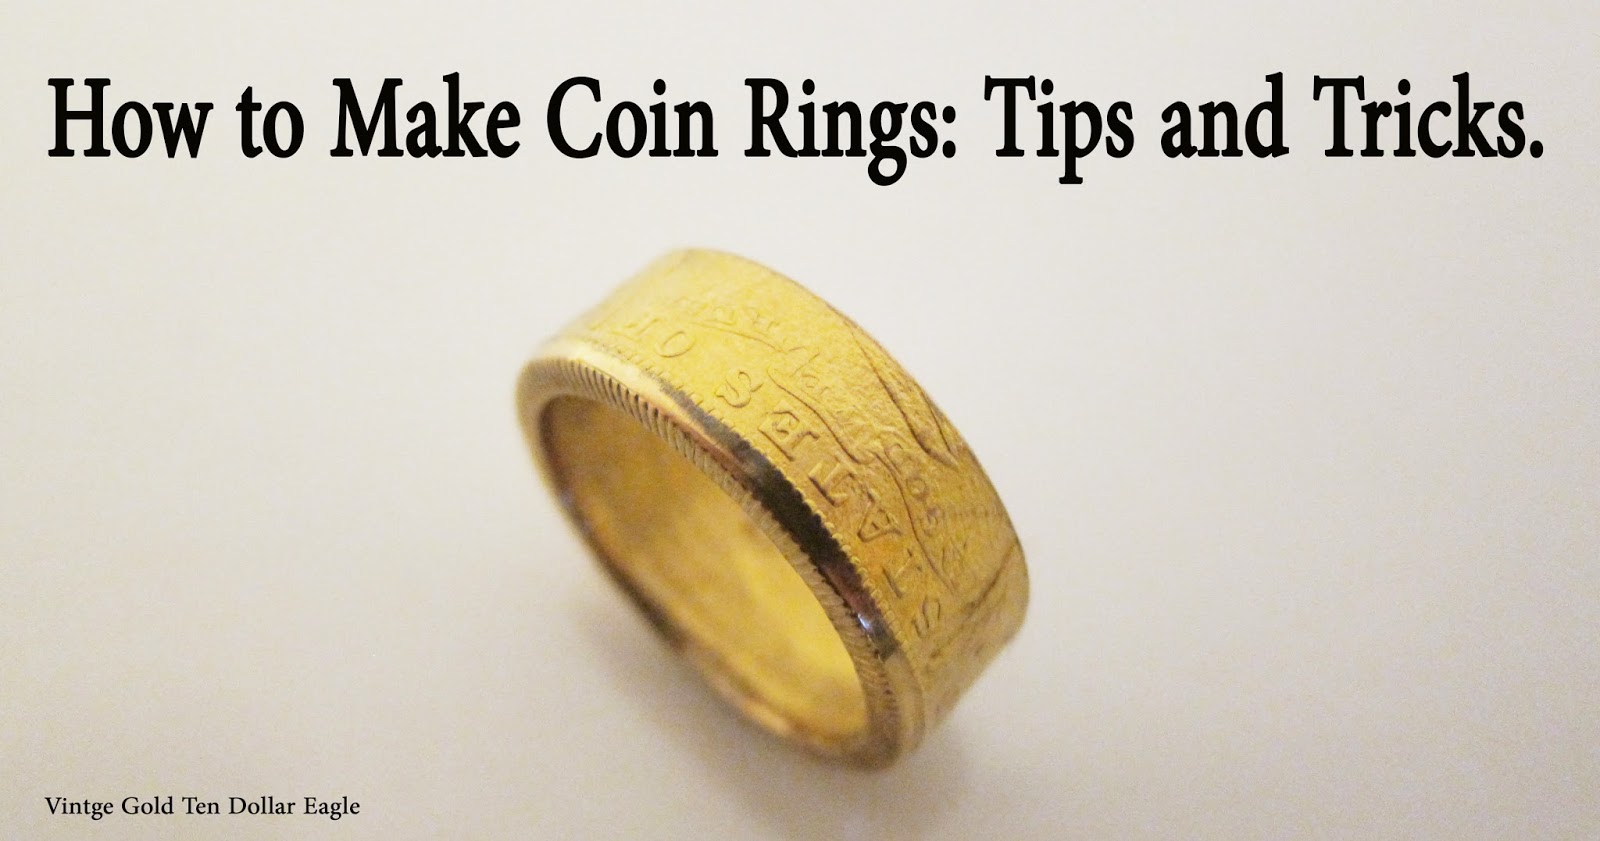
| (GOLD) Classic "49er" ™US 10$ Gold Eagle Ring |
 |
| (SILVER) Classic "The Mighty Dollar Gamblers Ring" ™ Morgan Silver Dollar Coin Ring. |
 |
| (CuNi) Australian 50 Cents Copper Nickel Scalloped Rim |
 |
| (BRONZE) 1864 Nova Scotia Large Cent. Canada Pre Confederation. |
Below are a couple short videos showing a couple rings I completed this month. They are up for sale now on Etsy. Have a look. And only buy from me if you really want it.
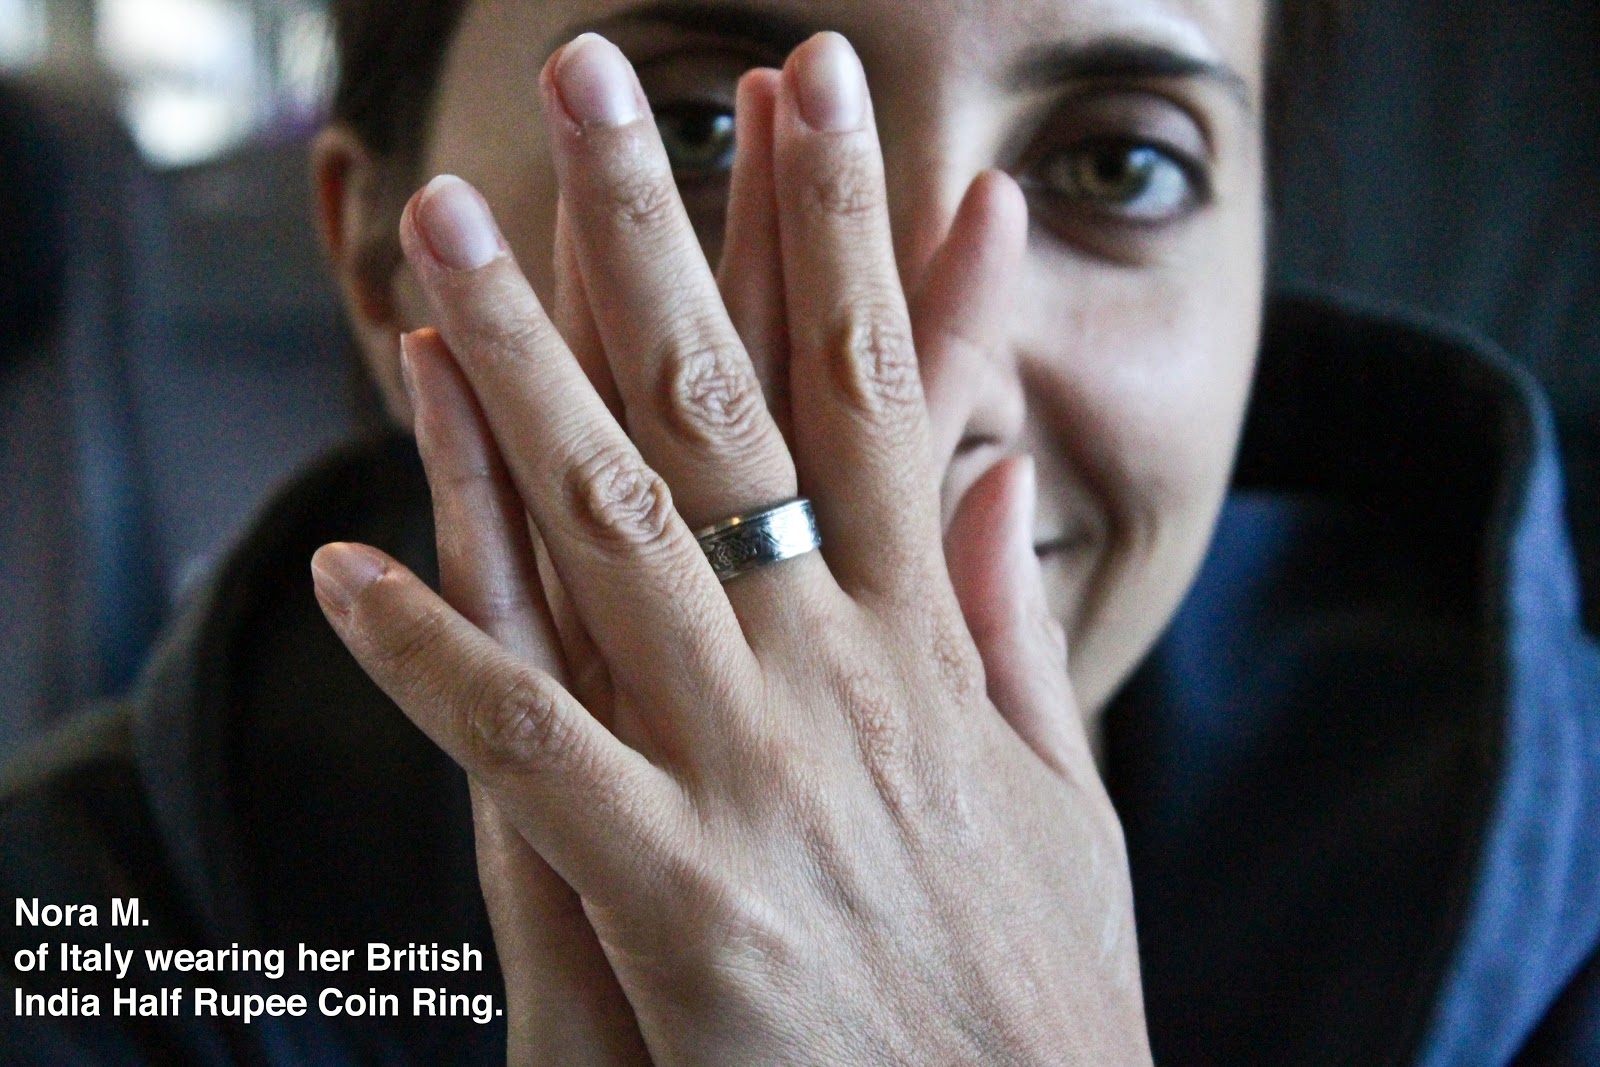
This Silver Morgan Dollar, is about as American as you can get in a coin ring. It shouts the wild west, it shouts the USA, the mighty dollar and is the most popular coin ring I get asked for. I make them in many sizes. But have not made enough in larger sizes. So here is one for those with larger hands.
The Japanese Silver 50 Sen. I have a total of four of these over the years. And they are my favorite coin from Asia. This coin was made from a brilliant Uncirculated Grade coin that was not cheap to aquire. But worth it due to its stunning detail.
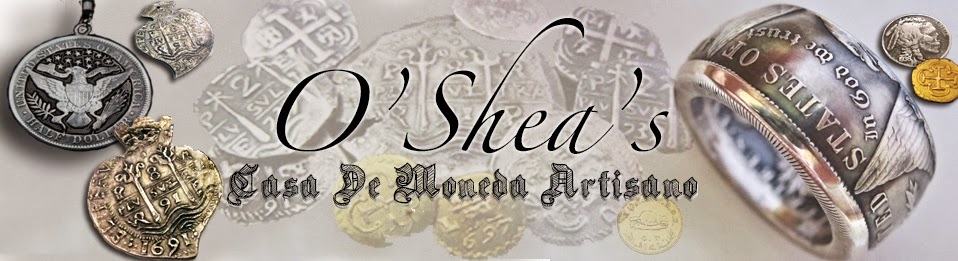
Below, is the wedding band you see up top of this post. It was made for a very nice couple as a wedding band. I thank them for the photo above. And wish them the best in their marriage.
"SupportHandMade"

Thanks


